Cloud - Technology HubSpot theme

Introduction

Template Name: Cloud - Travel and Hospitality HubSpot theme

We sincerely appreciate your support and sincerely hope you will find our theme useful. A neat, presentable, and adaptable HubSpot theme is Cloud. It's a great option for you because it was created especially to establish a great experience to plan the trip and stay seamlessly. This HubSpot theme will give your business a noticeable online presence, elevating it to the next level. You may easily change the way it looks to be more modern and elegant with a little bit of editing!

Template features:

  • Build with HTML, CSS, Hubl code, Java script, Jquery
  • 3 Homepage
  • Number of Templates: 20
  • Number of Modules: 33
  • Icon font (FontAwesome)
  • Neat Code
  • Modern and Innovative Design
  • complete responsive
  • slick animation
  • Easy to modify
  • Support for Multiple Browsers, Well Documented
  • Console error: No

Need Support?

Please submit a ticket at if you have any questions regarding theme difficulties https://inboundsys.com/contact

About HubSpot

To use this theme you must have an create account on HubSpot.
Files Contains

  • Documentation
  • Theme Files - Cloud
 

HubSpot Theme Installation

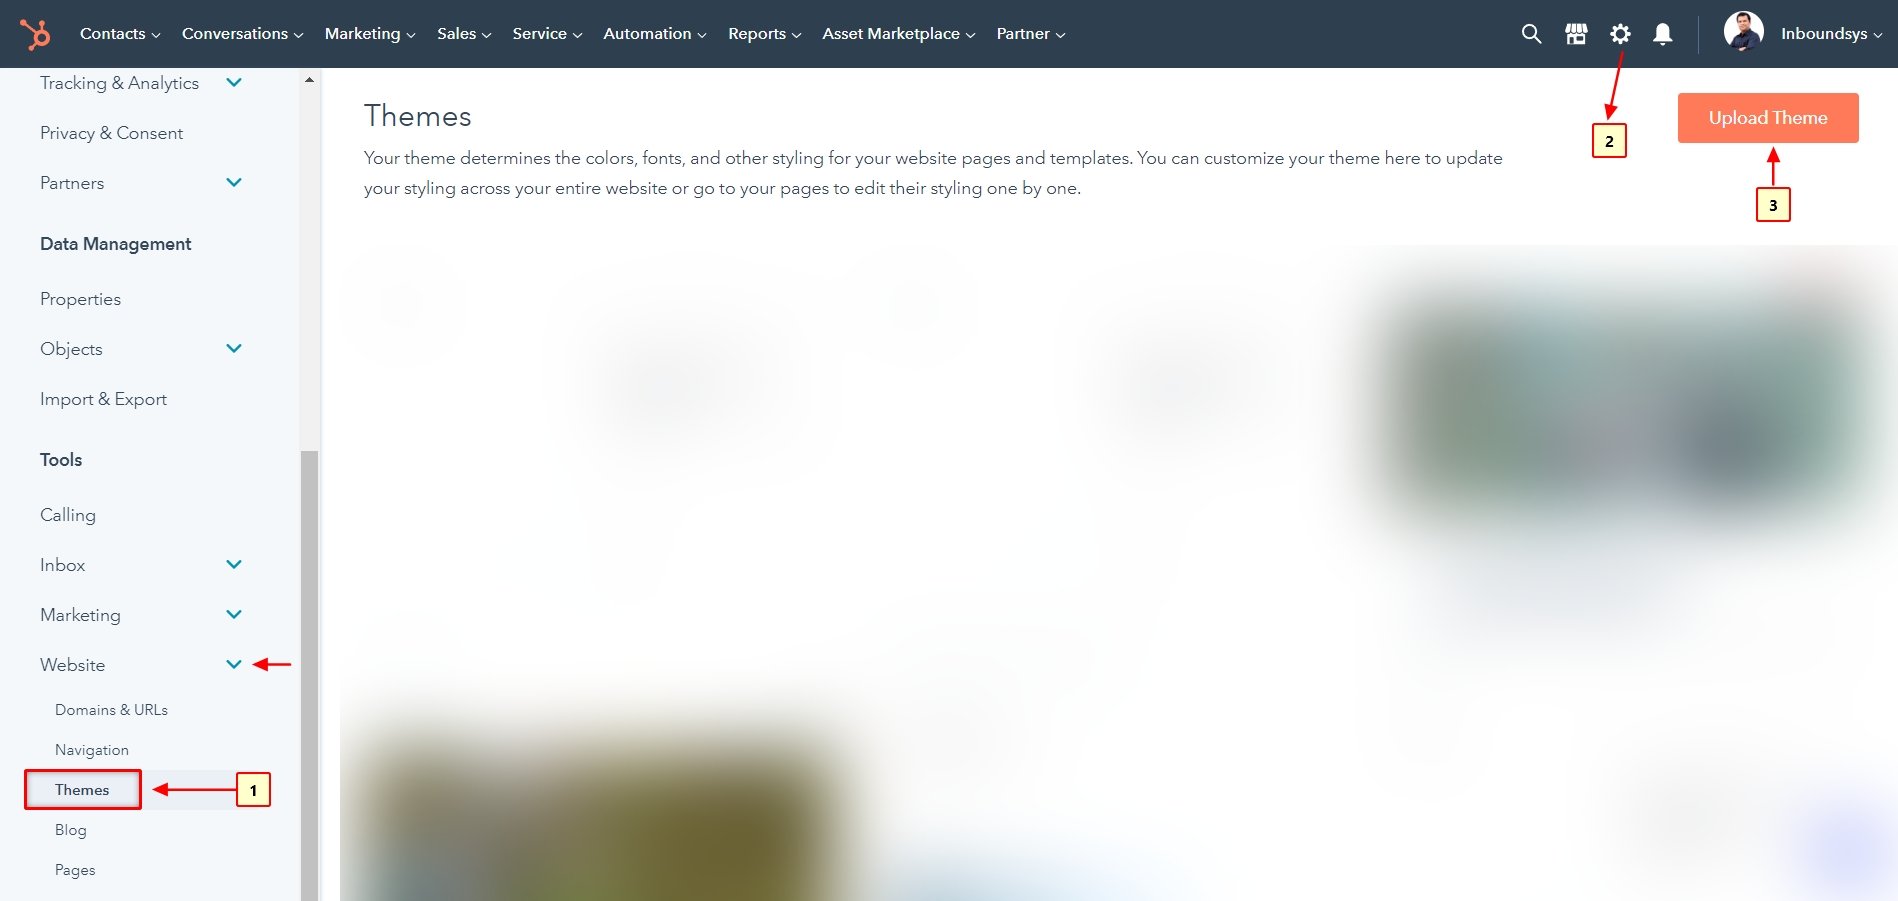
  • Step 1 – Login to your https://app.hubspot.com/login
  • Step 2 – Go to Navigation > Setting Icon
  • Step 3 – After Click In the left sidebar menu click Website > Themes .
Theme installation

To Create and Publish a page.

  • Navigate to Marketing > Website > Landing Pages or Website Pages.
  • Navigate to Create > Website Pages.
  • Select Template

Creatinhg Website and LP Pages

To export your content and data

Pages post and templates

  • Navigate to landing pages or website pages.
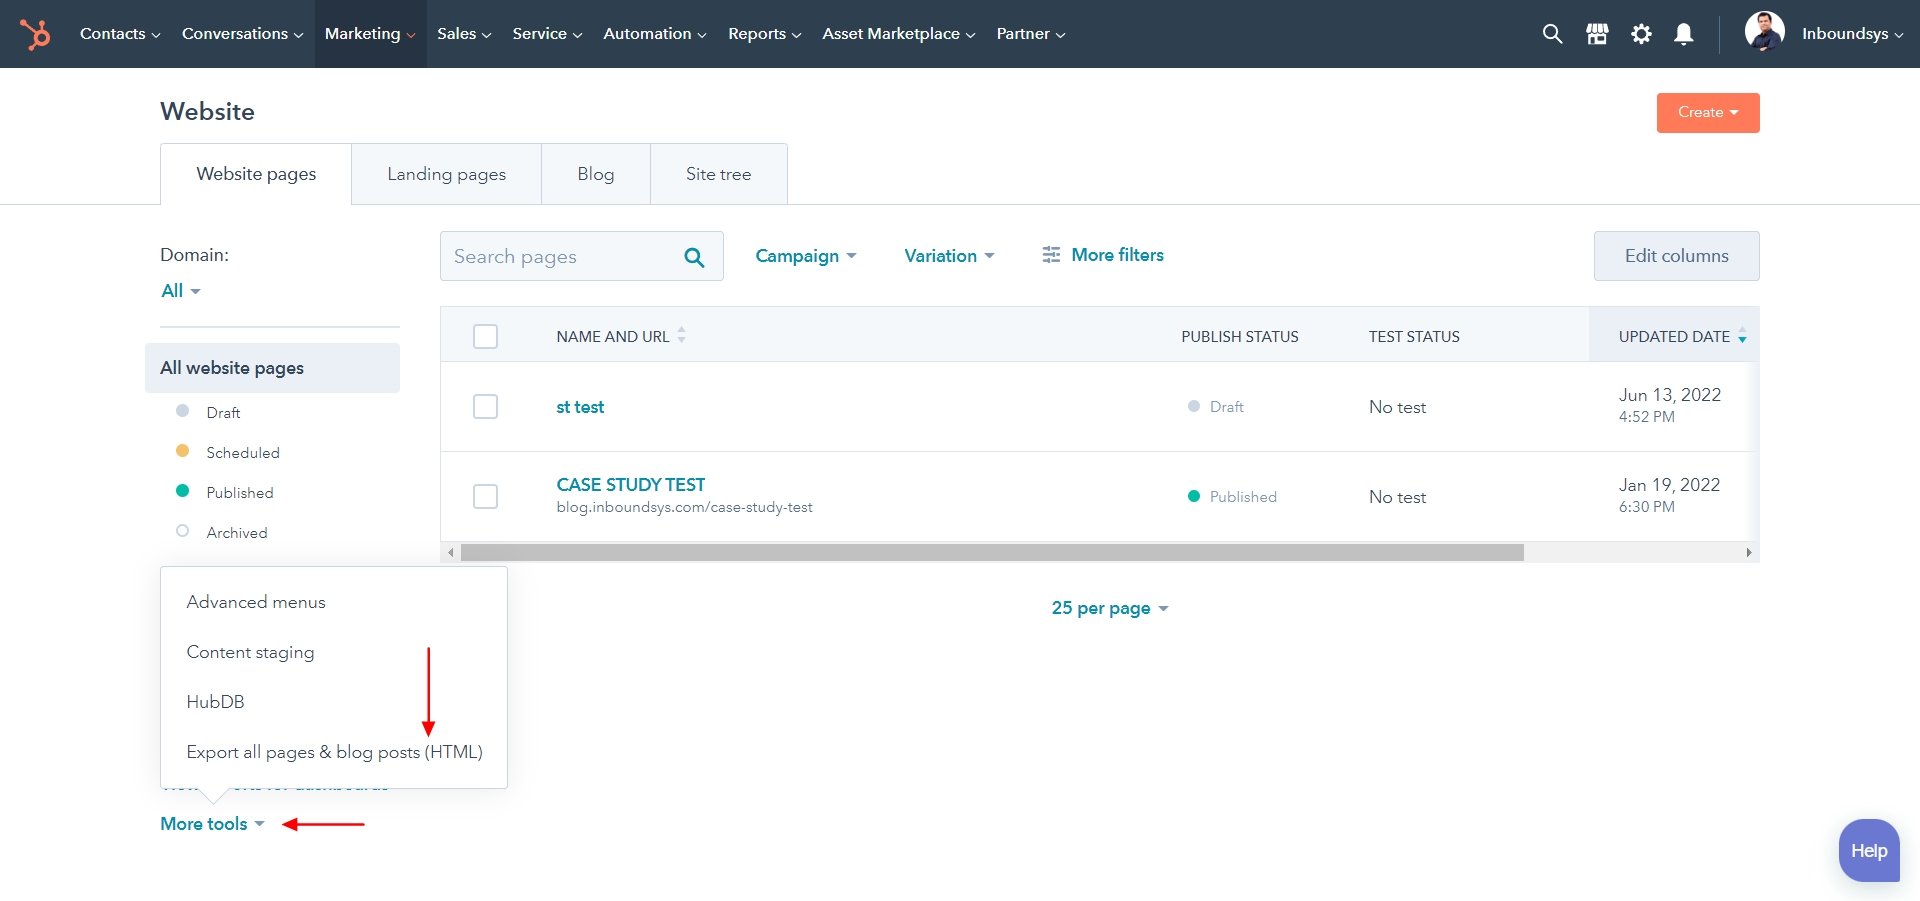
  • In the bottom left, click the More Tools dropdown menu and select Export all pages and posts. 
  • In the dialog box click Export. Once the export is processed, you'll receive a download link through email and in your notification center.

To export an HTML or CSV file of your blog posts:

  • In your HubSpot account, navigate to Marketing > Website > Blog.
  • In the bottom left, click the More Tools dropdown menu.
  • To export all pages and blog posts in HTML format, select Export all pages and blog posts (HTML). Then, in the dialog box, click Export.
  • To export all blog posts as a CSV or Excel file, select Export all blog posts. Then, in the dialog box, click the File format dropdown menu and select a file format. Then, click Export

How to Export Files

To export a .zip file containing all files in your file manager:
  • In your HubSpot account, navigate to Marketing > Files and Templates > Files.
  • Click Export all files (ZIP).
  • In the dialog box, click the Select an email dropdown menu and select or add an email address to receive a download link.
  • Click Export. Once the export is processed, you'll receive a download link through email and in your notification center.
Exporting Files

Customize branding

If you have Edit account defaults permissions, you can customize the company logo, default colors, and company information that display on meetings links, sales documents, quotes, chatflows, and other HubSpot content.
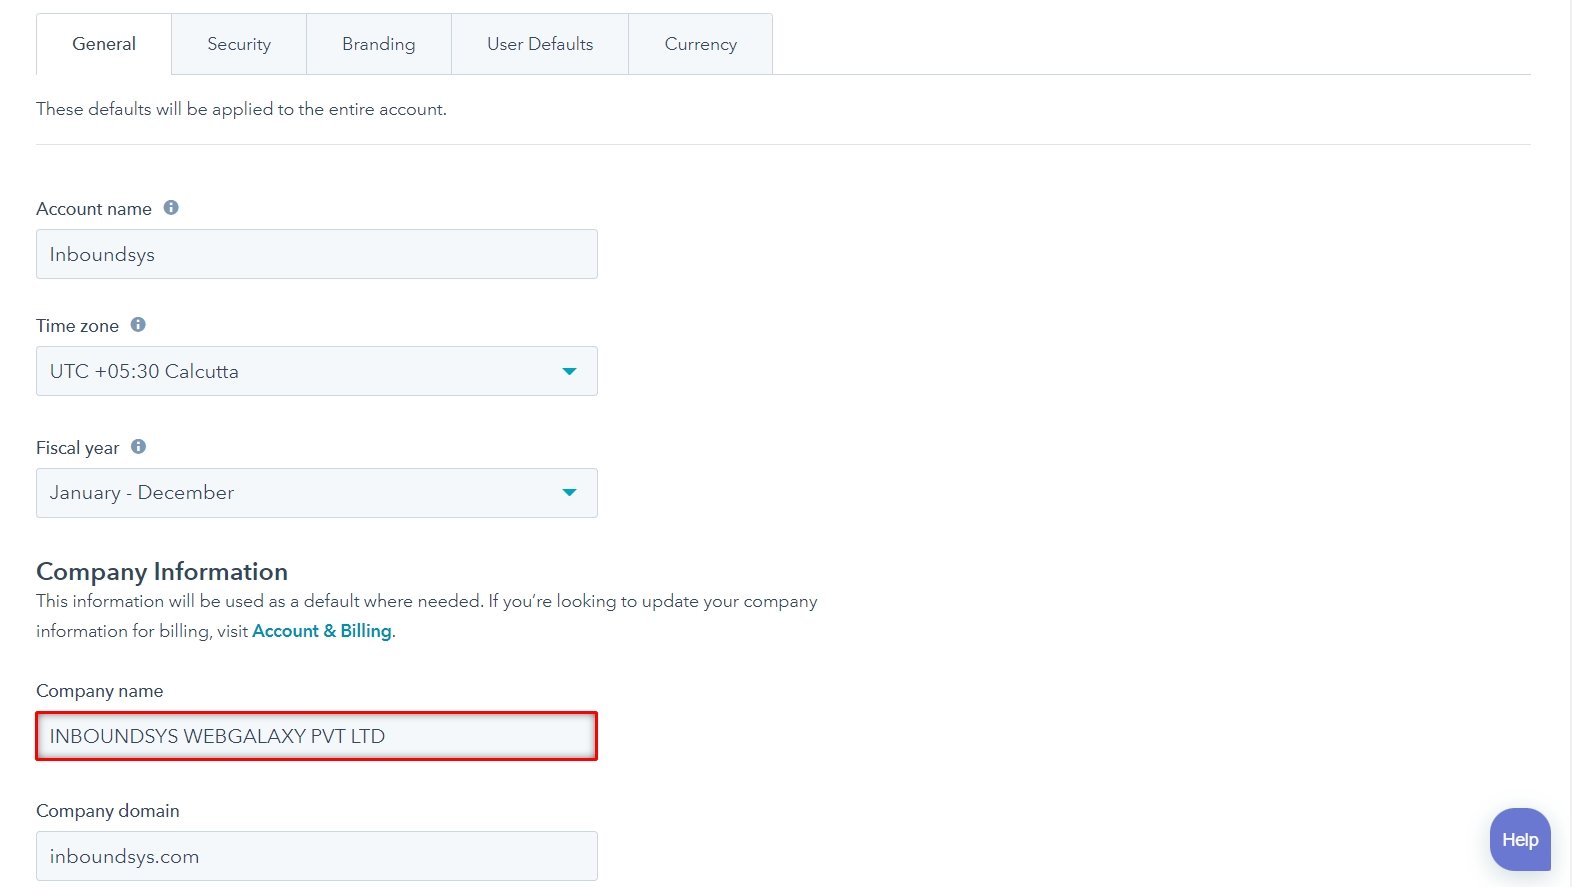
Name your business.

  • In your HubSpot account, click the settings icon in the main navigation bar.
  • In the left sidebar menu, select Account defaults. Under Company information, enter your Company name.
Company name

Personalize the colours and logo of your business.

To set your company logo and colors:
  • In your HubSpot account, click the settings icon settings in the main navigation bar.
  • In the left sidebar menu, select Account defaults.
  • Click the Branding tab.
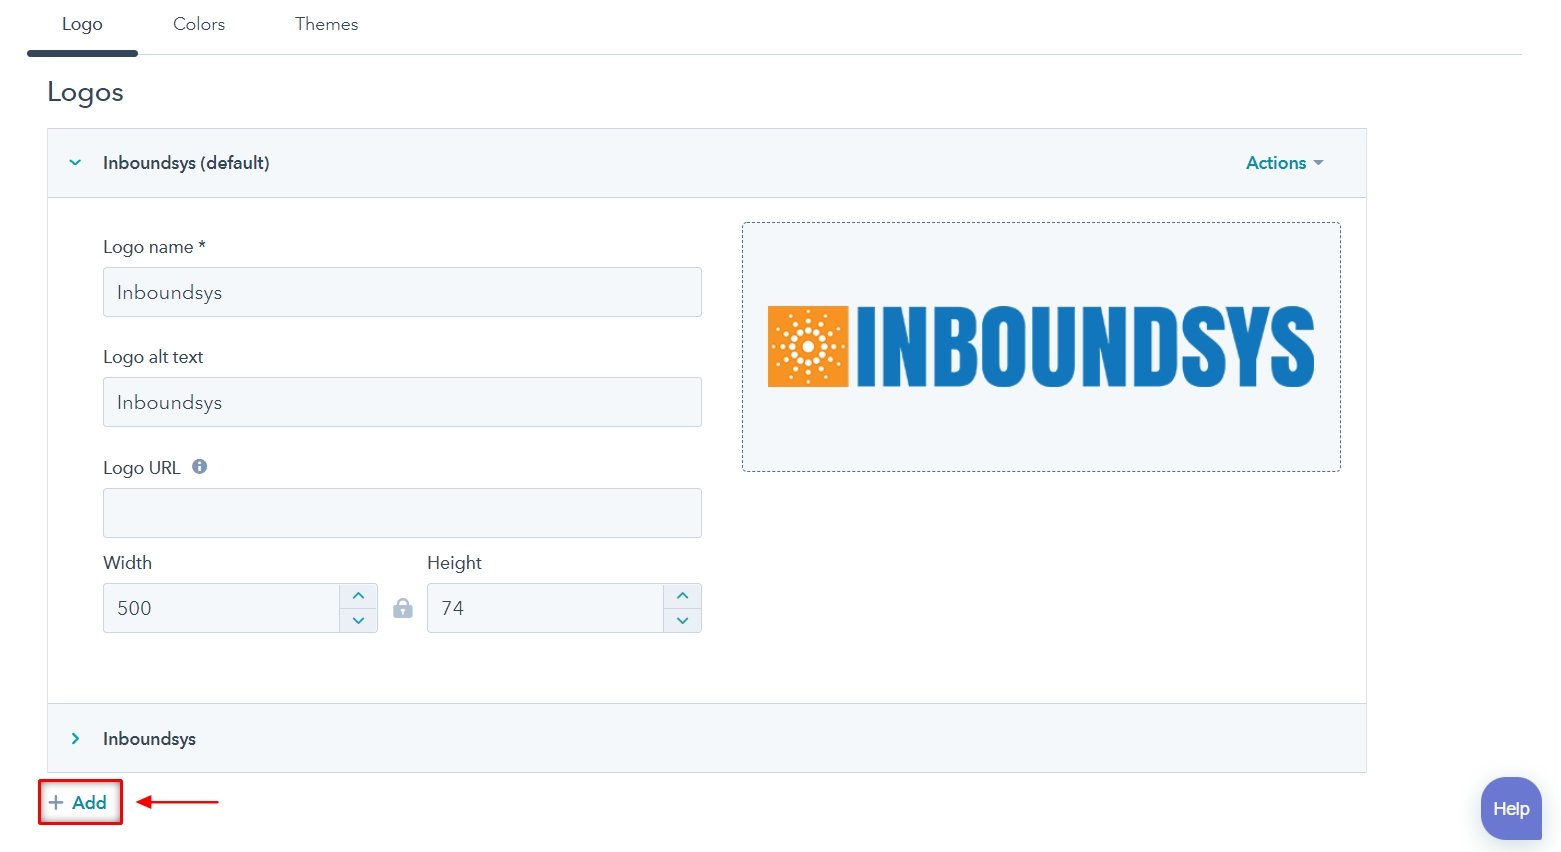
  • In the Logos section, click + Add to add a company logo. HubSpot will resize uploaded images before applying them to your sales tools.
  • To set a logo as the default, hover over the logo, then click Actions, then select Make default. The default logo will display on meetings links, sales documents, and quotes.
Brand Logo

To Setup Blog Page:

  • In your HubSpot account, click the settings icon settings in the main navigation bar.
  • In the left sidebar menu, navigate to Website > Blog.
  • In the top right, click Create new blog.
  • Set up your blog’s name, language, and URL.

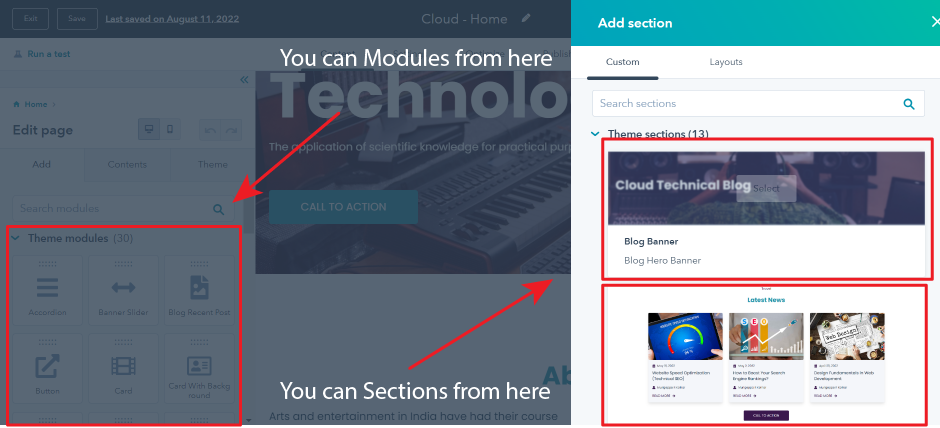
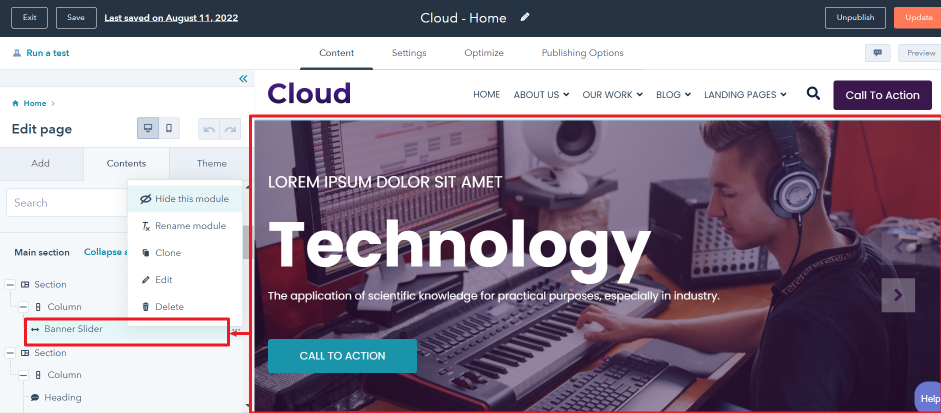
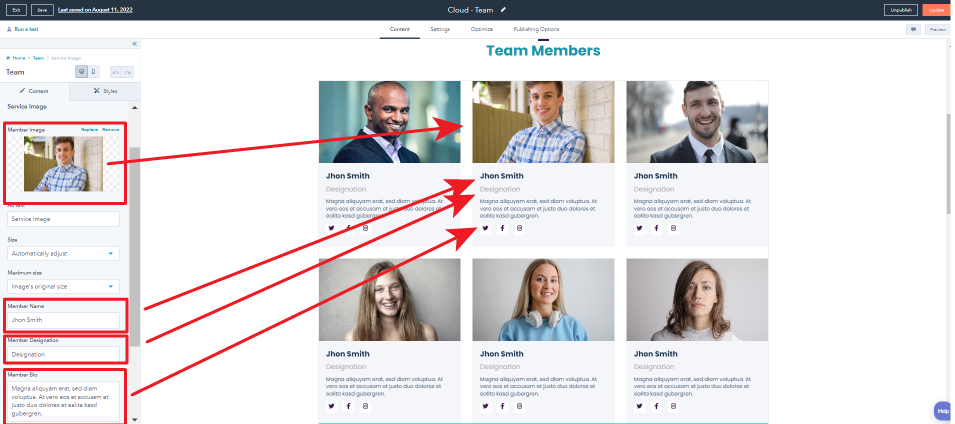
Customize the theme modules

Theme Modules can be customised, and all of the content and pictures can be changed.
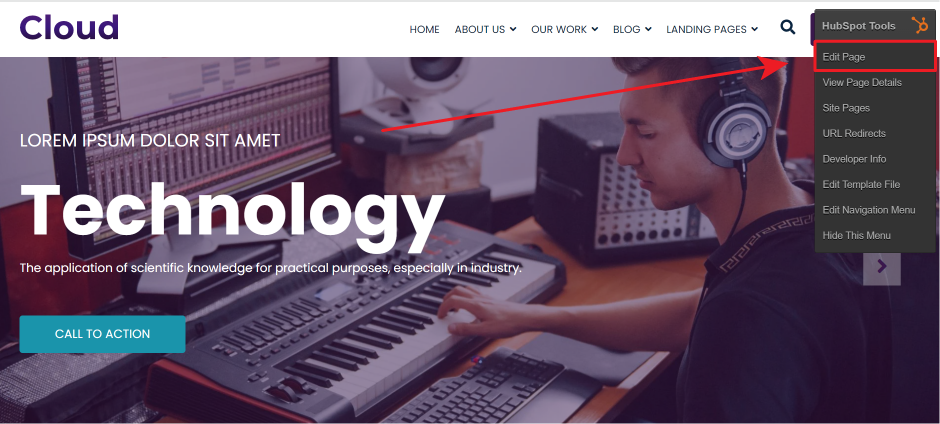
How to change the modules

CLoud_Theme-001
CLoud_Theme-002
CLoud_Theme-003
CLoud_Theme-004

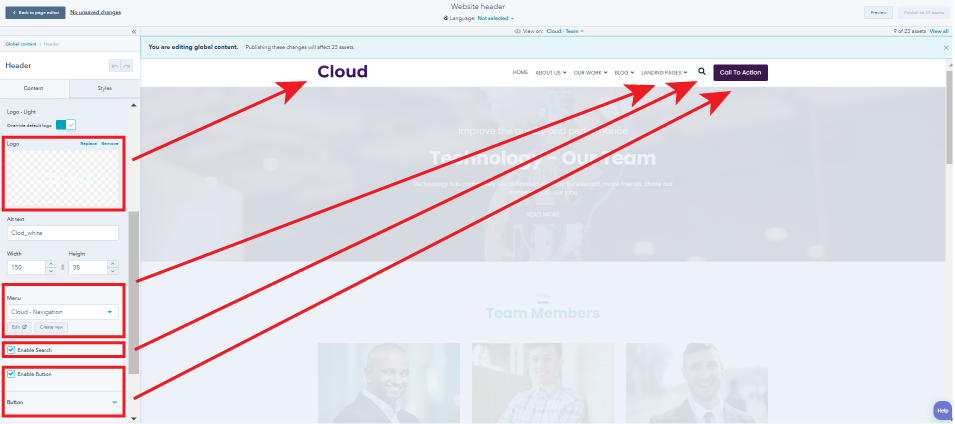
How to edit global content

All instances of this content in your account will be affected by any modifications. Before publishing, you will be able to preview your modifications on all assets. This general stuff is applicable to your entire theme.
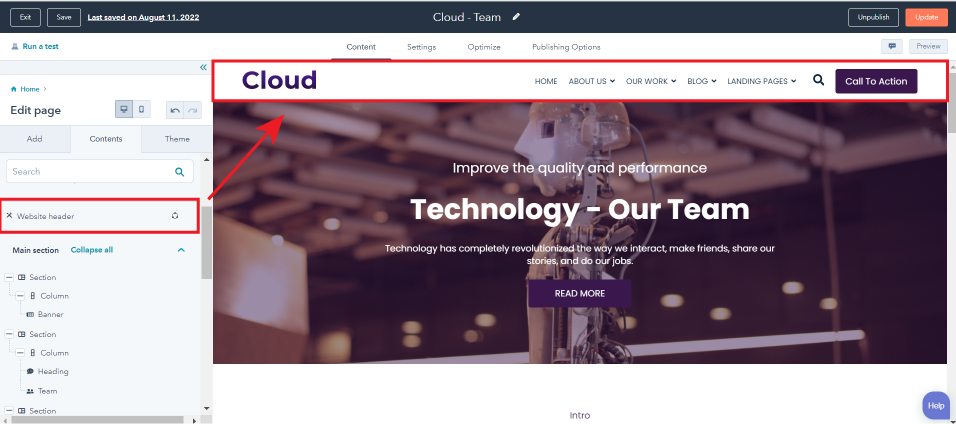
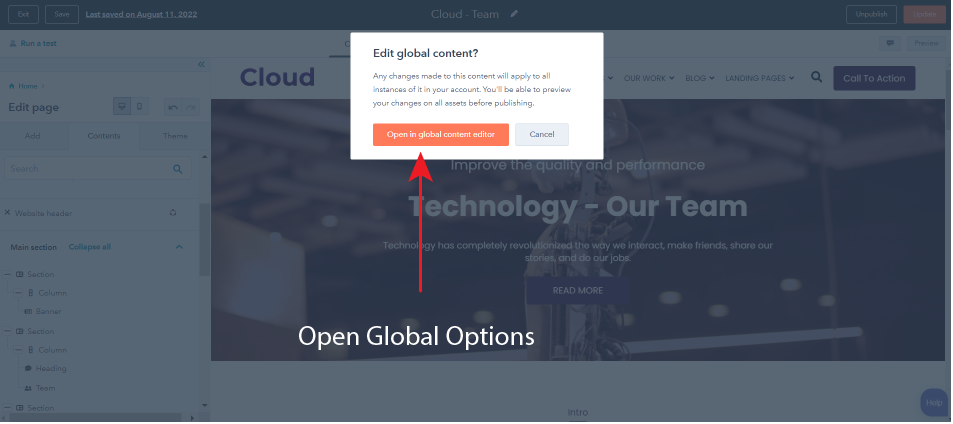
How to change the global content

CLoud_Theme-006
CLoud_Theme-005
CLoud_Theme-007

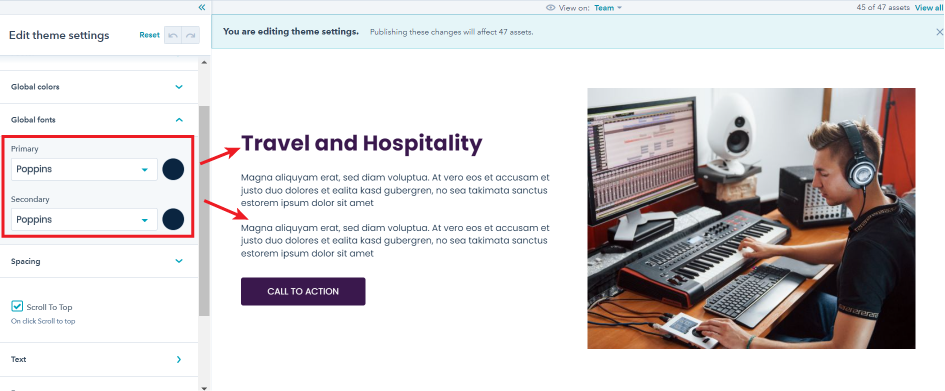
How to change theme setting

Your theme options have been used to style this page. Multiple pages on your site may change as a result of changing these settings.
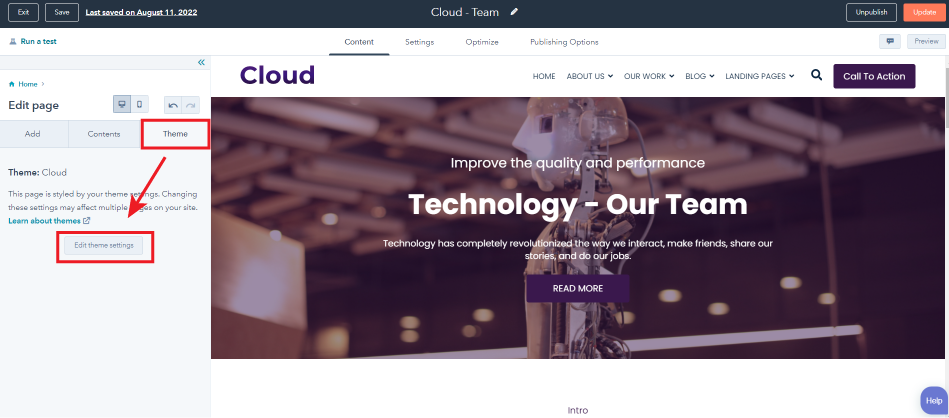
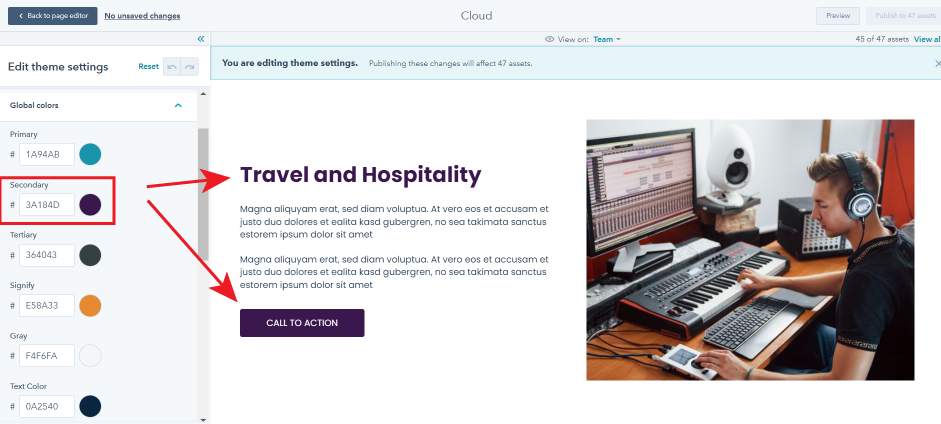
Let's look at how to alter the theme settings.

CLoud_Theme-010
CLoud_Theme-008
CLoud_Theme-009

Support

Hopefully this documentation would help you in getting your website ready by following a few simple steps. We sincerely hope that using it will be fulfilling your requirement. When it comes to customizing, installing, or using our themes, we are available to assist in any way that is required. 

Please contact us by filling this form https://inboundsys.com/contact or drop us email at contact@inboundsys.com